
Table of Contents
ToggleInstalling laminate flooring looks simple until you’re standing in the aisle at the home center, staring at a wall of tools and wondering what you actually need. The truth is, you don’t need every tool on the shelf, but you do need the right ones. A solid laminate flooring installation depends less on having a workshop full of gear and more on having the essentials that let you measure accurately, cut cleanly, and work safely. This guide covers the laminate flooring installation tools every DIYer should own or rent, plus how to set up a complete kit without very costly. Whether you’re tackling one room or multiple spaces, knowing which tools matter will save you time, frustration, and costly mistakes.
Key Takeaways
- Essential laminate flooring installation tools include a 25-foot tape measure, rubber mallet, spacers, carpenter’s square, and utility knife to ensure precise measurement and safe handling.
- Invest in a miter saw for crosscutting and a circular saw with straightedge guide for lengthwise cuts, as precision cutting separates professional results from poor installations.
- Safety gear is non-negotiable—wear ANSI-rated safety glasses, a P100 respirator or N95 mask, hearing protection, work gloves, and closed-toe shoes to protect against laminate dust and workshop hazards.
- Specialty tools like laminate cutters, tapping blocks, pull bars, and moisture meters prevent common installation failures such as buckling, gaps, and subfloor moisture issues.
- Rent or borrow power tools instead of buying them for one-time projects; prioritize owning hand tools and quality blades while keeping total startup costs under $300 for a complete kit.
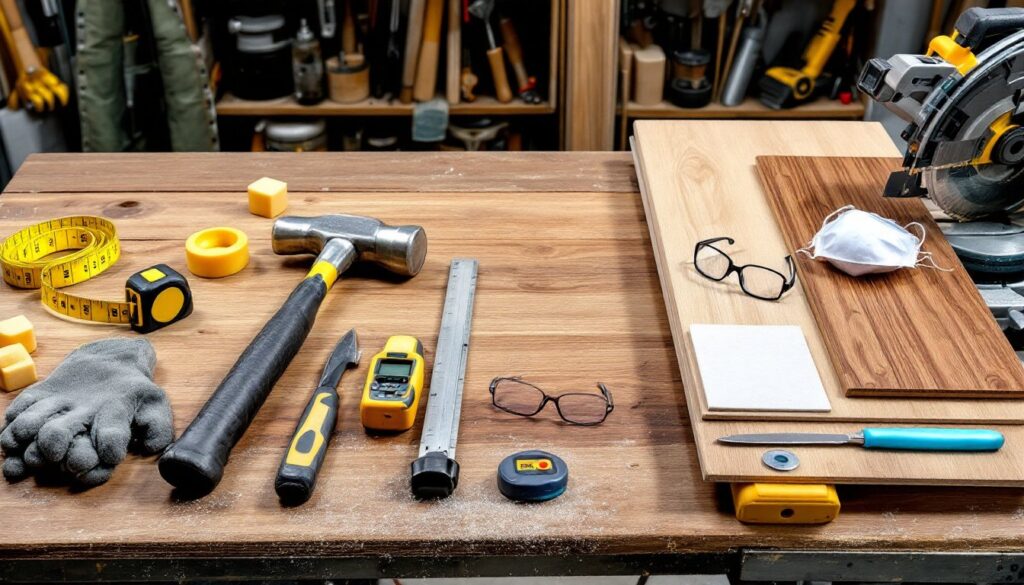
Essential Hand Tools for Laminate Flooring Installation
Hand tools form the backbone of any laminate installation. You’ll reach for these repeatedly, so buy quality versions that won’t wear out mid-project.
Start with a tape measure, at least 25 feet. Laminate installation demands precision from the first board: measure room width, length, and diagonal distances to confirm square corners. A crooked start compounds across the floor.
A hammer and rubber mallet serve different purposes. The rubber mallet taps laminate planks into place without denting them: the hammer helps drive finish nails for trim work. A 16-ounce rubber mallet is plenty.
You’ll also need spacers. These small plastic wedges maintain consistent expansion gaps (typically ¼ inch) between the floor and walls. Without spacers, laminate can buckle as it expands and contracts with humidity. Buy a set of 20 to 30: they’re cheap and reusable.
A handsaw or pull saw works for crosscutting planks lengthwise in tight spots where a power tool won’t fit. A nail set and pry bar handle trim removal and minor demolition, essential if you’re replacing old flooring. A utility knife scores and trims underlayment: keep blades sharp.
Round out the essentials with a carpenter’s square or speed square for checking room corners and marking cut lines. A pencil and marking gauge ensure your cuts land exactly where you intend.
Measuring and Cutting Tools You’ll Need
Precision cutting separates polished work from janky installations. Laminate tolerates very little error: doors must close smoothly, planks must fit snugly, and seams need to stay tight.
A miter saw (also called a chop saw) is your best friend for crosscutting planks to length. It makes clean, square cuts with minimal chipping and lets you set exact angles for joints. A circular saw works as a second option but demands a steady hand and a cutting guide to avoid wandering lines. For rip cuts (cutting planks lengthwise), a table saw wins, but a circular saw with a straightedge guide gets the job done.
These tools produce a lot of fine laminate dust, more on that under safety gear. For notching around door frames and irregular shapes, a jigsaw is invaluable. It cuts curves and tight angles that a miter saw can’t touch.
A miter box (a simple three-sided guide for hand saws) is cheap insurance if you want to avoid power tools for small cuts. It’s slower but accurate and quieter.
Measure twice, cut once: use a measuring tape and pencil to mark your cut lines clearly. Draw a line across the face of the plank and double-check the measurement before cutting. Laminate shows every mistake.
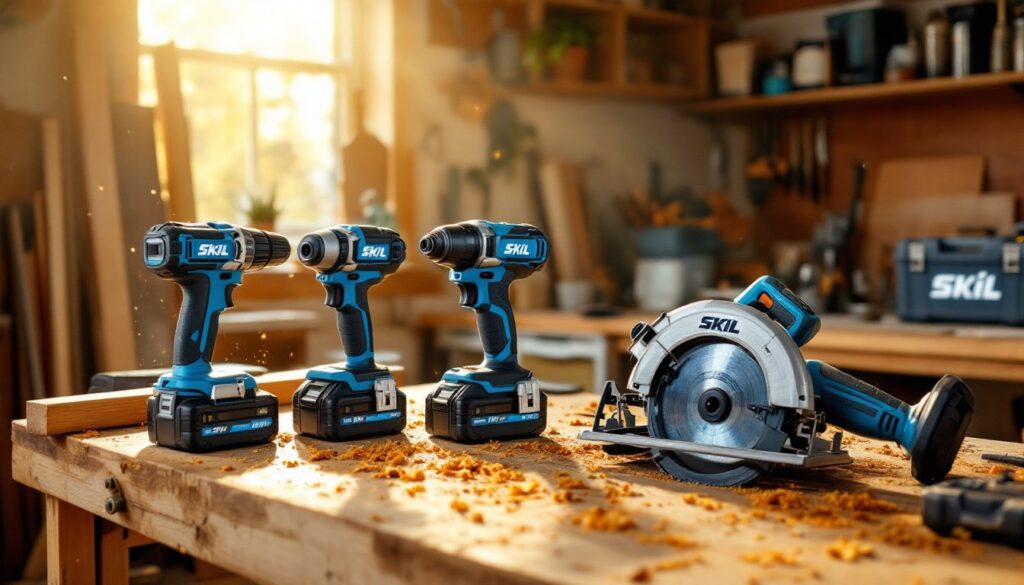
Power Tools That Make Installation Easier
Power tools aren’t mandatory, but they transform a grueling day into a manageable one. If you’re installing laminate in more than one room, renting or borrowing power tools is worth every dollar.
A miter saw (10 to 12 inch) tops the power tool list. It crosscuts planks with factory-clean edges, leaving no chip-out on the visible face. A quality blade costs $20 to $40 and makes a visible difference.
A circular saw with a fine-toothed blade handles both crosscuts and lengthwise cuts. Pair it with a straightedge guide (a clamped aluminum track) for straight, accurate rips. A table saw is faster for long rips but takes up floor space and isn’t essential for a small project.
A jigsaw is nearly essential if you’re cutting around door frames, heat vents, or irregular shapes. Handheld and affordable to rent, it cuts curves a miter saw can’t touch.
A power drill with bits and a screwdriver bit helps if you’re fastening underlayment or trim. It’s not critical but saves your wrist on a big job.
A pneumatic stapler or brad nailer speeds trim installation: if you’re nailing down a perimeter, it’s a game-changer. Rent one for under $20 per day at most tool shops. Modern resources like popular guides on laminate flooring installation detail how power tools fit into the workflow.
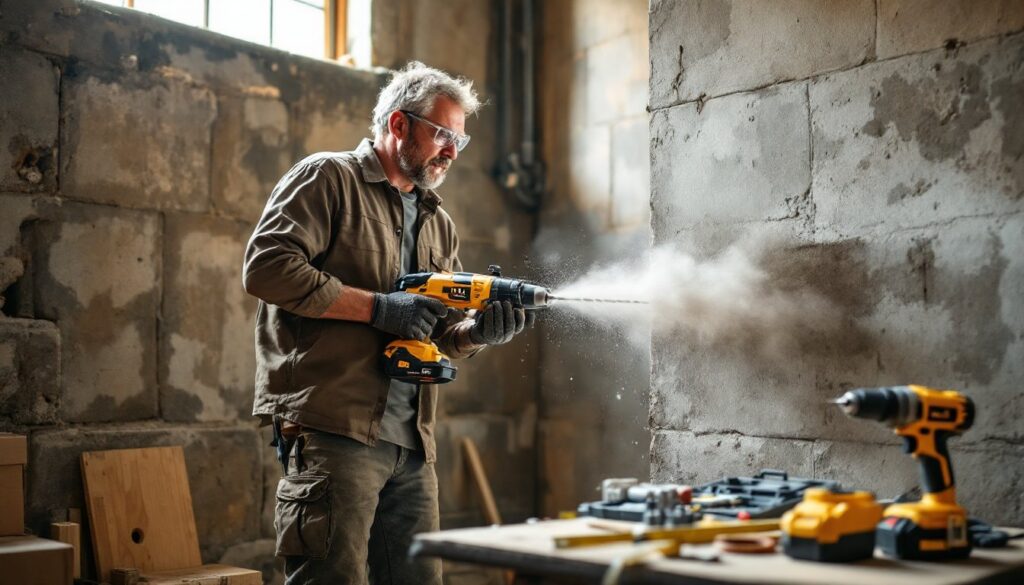
Safety Gear and Protective Equipment
Laminate dust is fine, persistent, and irritating. PPE isn’t optional, it’s the difference between finishing a project comfortably and coughing for three days.
Safety glasses protect your eyes from airborne chips when ripping or crosscutting. Look for ANSI Z87.1-rated glasses that cover the sides. Dust from power tools travels sideways as much as forward.
A dust mask or respirator is critical. Laminate particulates are fine enough to lodge in your lungs. For short cuts, a disposable N95 mask works: for extended work, invest in a reusable half-mask respirator (P100 cartridges block fine particles and sawdust). Change filters when airflow becomes harder to pull.
Hearing protection matters if you’re using a miter saw for hours. Prolonged exposure above 85 decibels causes permanent hearing damage. Foam earplugs or over-ear muffs both work: combine them for max protection in a noisy shop.
Work gloves protect your hands from splinters and sharp plank edges. Laminate trim edges are sharper than they look. Heavy-duty work gloves with a good grip also help when handling large sheets or underlayment.
Wear closed-toe shoes with good grip. Dropped planks hurt, and wet subfloors get slippery. Keep a first aid kit nearby: cuts and splinters are common on flooring projects. According to Today’s Homeowner, proper protective gear prevents most workshop injuries.
Specialty Laminate Flooring Tools Every DIYer Should Have
A few tools exist solely for laminate work and pay for themselves on a single room install.
A laminate cutter (also called a pull cutter) is a guillotine-style tool that crosscuts planks without producing sawdust. You place the plank in the cutter, close the lid, and pull a handle down. It’s loud, compact, and produces nearly zero dust. Rental shops have them for $10 to $15 per day. If you’re sensitive to dust or installing in a finished home, it’s worth the rental.
A laminate tapping block (a small wooden or plastic block) protects plank edges when you’re hammering them together. Striking laminate directly with a hammer causes dents: the block spreads the force and prevents damage.
A laminate pull bar (also called a grooming tool) slides under the tongue of the last plank and lets you pull it tight without straining your back or damaging trim. For floating floors (which most laminate installations are), this tool prevents gaps.
A moisture meter checks the subfloor before installation. Laminate expands and contracts with humidity: if the subfloor has above 12% moisture, acclimate the laminate and dry the subfloor first. This step prevents buckling and cupping weeks after installation.
An underlayment roller compresses the underlayment and ensures full contact with the subfloor. It prevents squeaks and pops as you walk. Manual rollers cost under $30: they’re lighter and quieter than power versions. Quality underlayment, often moisture-barrier underlayment in kitchens and bathrooms, is worth the cost.
Building Your Complete Tool Kit on a Budget
You don’t need to own everything. Rentals and borrowing keep costs down, especially for pricey power tools.
Estimate realistic costs. Hand tools run $100 to $200 total if you start from scratch. A used miter saw costs $80 to $150: a circular saw, $40 to $100. Rental shops charge $10 to $25 per day for specialized tools like laminate cutters, pull bars, and rollers. For a weekend project, renting is smarter than buying.
Prioritize what you own. Buy quality tape measures, hammers, pencils, and spacers, you’ll use them forever. Borrow or rent pricey power tools, especially if it’s a one-time project. Many local tool-sharing libraries and home centers let members borrow tools for free or a small deposit.
Buy blades and consumables separately. A $40 fine-toothed blade for your miter saw or circular saw transforms cut quality. Cheap blades chip and burn: good ones leave clean edges. Similarly, invest in quality underlayment and spacers: they’re cheap insurance.
Check before you buy. Ask friends or neighbors if you can borrow a miter saw or jigsaw. Many homeowners have tools sitting unused in the garage. Returning a borrowed tool with a thank-you bottle of wine costs nothing and saves $100+.
Plan your cuts ahead. Fewer cuts mean fewer tools needed. Sketch a layout, estimate waste, and group similar cuts so you set up each tool once. This approach speeds work and reduces tool switching. Resources like Popular Mechanics offer detailed tool reviews and project planning tips. For professional advice on trickier floors, professional flooring repair contractors handle complex jobs and can recommend tools for your specific space.
Conclusion
Laminate flooring installation rewards careful planning and the right tools. You don’t need everything, prioritize accuracy (tape measure, square, miter saw), safety (glasses, mask, gloves), and protection (spacers, underlayment). Start with hand tools and essentials, rent power tools for the day, and borrow when you can. With a solid kit and a little patience, you’ll install a floor that stays flat and tight for years.