
Table of Contents
ToggleConcrete work around the home doesn’t always require heavy machinery or a contractor’s crew. Small repairs, patching, driveways, and decorative concrete projects are well within reach for a motivated homeowner with the right concrete hand tools. Whether you’re fixing a cracked foundation, pouring a walkway, or creating a smooth concrete countertop, understanding which tools to use, and how to use them properly, makes all the difference between a rough-looking result and professional-grade work. This guide breaks down the essential tools you need, how to choose quality equipment, and how to maintain your kit for years of reliable use.
Key Takeaways
- Concrete hand tools give homeowners precise control over small repairs, patching, and decorative projects without requiring heavy machinery or contractors.
- A starter kit with a finishing trowel, margin trowel, concrete edger, float, cold chisel, masonry hammer, and safety gear covers most DIY concrete work needs.
- Timing is critical—using concrete hand tools correctly depends on the concrete’s stage (plastic, wet, or leather-hard), as the same tool produces different results at different times.
- Proper maintenance, including immediate rinsing, thorough drying, and flat storage, prevents rust and pitting so your concrete hand tools last for years of reliable use.
- Slip-resistant finishes using broom or concrete brush texture are required by ADA standards and local codes for public-facing concrete surfaces like walkways and ramps.
- Always wear safety gear including goggles, work gloves, and a dust mask or respirator, as concrete dust contains silica that causes serious long-term respiratory damage.
Understanding Concrete Hand Tools and Their Core Purpose
Concrete hand tools serve three main functions: moving and placing the material, smoothing and finishing surfaces, and breaking or demolishing existing concrete. Unlike power tools, hand tools give you precise control and work best for smaller areas, detail work, and finishing passes that power tools can’t reach or would damage. Most concrete hand tools, trowels, floats, chisels, and hammers, are relatively simple in design but require technique and practice to master.
The key to getting good results is understanding the difference between placing concrete and finishing it. Placing involves moving the wet concrete into forms and getting it roughly level. Finishing means smoothing, leveling, and creating the final texture. Different tools handle each phase, and using the right tool at the right time prevents rework and frustration. A trowel works differently when concrete is plastic (wet and workable) than when it’s leather-hard (partially set). Same tool, different timing, completely different outcome.
Must-Have Concrete Hand Tools for Homeowners and DIY Beginners
Trowels, Floats, and Finishing Tools
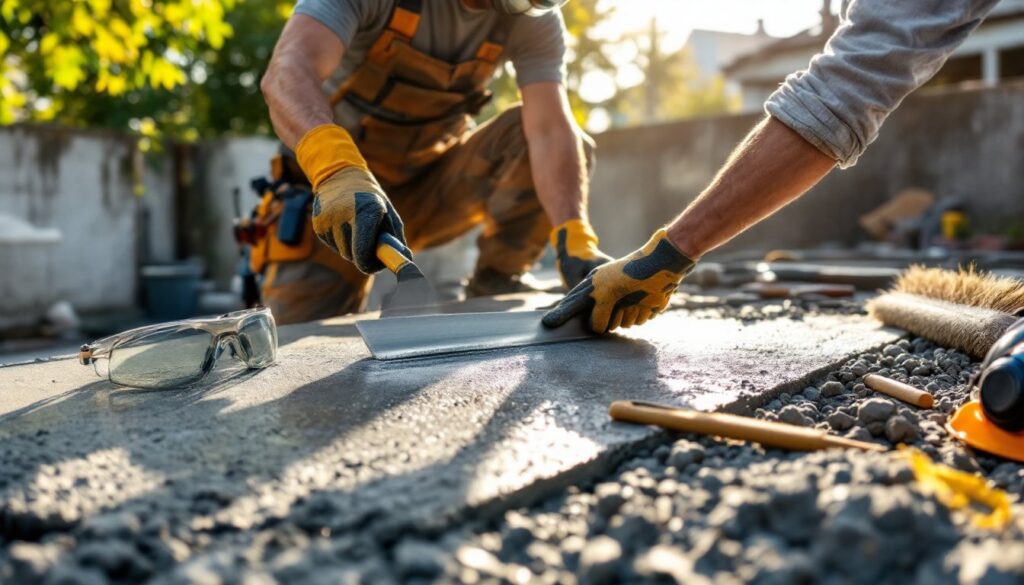
A rectangular finishing trowel (typically 10 to 14 inches wide) is the workhorse of concrete finishing. It’s used after initial placement to smooth, level, and burnish the surface. The blade is slightly curved to allow the front edge to lift off concrete without dragging, reducing friction and friction marks. For smaller repairs or edges, a margin trowel (4 to 6 inches wide) gets into tight spots and patches.
Floats, aluminum or magnesium tools with larger, flatter surfaces, come next. A float bridges minor humps and hollows, pressing down high spots and filling voids with extra concrete that’s worked into them. Magnesium floats are slightly more aggressive for rough-textured finishes: aluminum is lighter and better for fine smoothing. A concrete float is different from a drywall float: use the right one for your material.
Concrete edging tools have a rounded or beveled lip that creates a neat, finished edge along the perimeter of a slab. Running an edger along formwork before the concrete fully sets prevents sharp edges and reduces chipping. Brooms and specialty finishes (like a push broom for a slip-resistant texture) are applied during the finishing phase. A concrete brush creates a light aggregate exposure or anti-slip texture as the concrete firms up.
Building Code or Standard Note: Most public-facing concrete (walkways, ramps) requires a slip-resistant finish per ADA standards and local codes. A broom finish is the simplest and most common approach.
Chisels, Hammers, and Breaking Tools
For demolition, repair, and breaking out concrete, concrete chisels (also called cold chisels) paired with a heavy-duty hammer are essential. A cold chisel has a hardened blade and flat or pointed tip. A flat chisel works for general breaking and cleanup: a point chisel (or peen hammer) digs into cracks and controlled breakout. Always use a hammer rated for masonry or concrete work, typically 2 to 4 pounds, not a standard claw hammer, which can shatter and send fragments flying.
A pneumatic or rotary hammer does the heavy work, but hand chisels are often safer and more controlled for smaller areas. Pair them with proper PPE: safety goggles, work gloves, and a dust mask or respirator (concrete dust contains silica, which is a serious respiratory hazard). Concrete dust exposure over time causes silicosis: don’t skip the mask.
For demolition on a larger scale, a pry bar or breaker bar (a long, heavy steel bar with a wedge end) helps dislodge broken sections. It’s leverage, not just brute force. Drive the chisel in, rock the bar against the concrete, and the pressure does the work.
Choosing Quality Tools and Building Your Starter Kit
Budget matters, but the cheapest trowel isn’t always the best value. A flimsy blade that bends under pressure makes finishing harder and slower: you’ll end up frustrated and considering a contractor call. Look for steel or magnesium blades with rigid handles. Reputable masonry tool brands like Marshalltown, QEP, and Kraft Tool have been around because they deliver consistent performance. You don’t need every variant on day one.
A starter kit for most homeowners includes:
• 12-inch finishing trowel (or 10-inch for smaller spaces)
• 4 to 6-inch margin trowel
• Concrete edger
• 36-inch aluminum float
• 2 to 3-pound cold chisel and 3-pound masonry hammer
• Brush or broom for texture
• Safety gear (goggles, gloves, mask)
If you’re patching or working on decorative concrete, add a sponge float for light sanding and smoothing once concrete cures. Projects detailed on platforms like Instructables often show tool setups for specific tasks: matching your kit to the work ahead saves money and prevents tool creep.
Buy from tool suppliers or home improvement stores where staff can recommend products based on your specific project. Online reviews help, but in-hand feel matters, a trowel that’s comfortable to grip and not too heavy reduces fatigue over a full day of finishing work.
Maintenance, Safety, and Storage Tips
Concrete is alkaline and corrosive to steel. Rinse tools immediately after use with clean water and dry them thoroughly. Leaving residue on a blade causes pitting and rust, which wrecks the smooth surface finish trowels need. Store trowels flat or blade-up (never blade-down on concrete, where they dull and pit). Hang chisels and hammers in a dry spot: corrosion weakens steel and impacts striking power.
Check blade edges and handles regularly. A bent or dull trowel blade should be replaced: trying to work it back into shape wastes time and energy. Handles crack from drops or impacts: a safety-wired tool is less likely to end up in wet concrete mid-swing. Wear heavy work gloves when handling tools, trowel edges are sharp and concrete dust is irritating.
Store in a dry space, ideally in a toolbox or wall-mounted rack. Humidity and temperature swings cause handles to warp or crack. Concrete tools take up little space and are worth protecting. A $15 trowel stored properly will outlast a $50 trowel left outside. Resources like Fine Homebuilding detail pro techniques, including tool care, that translate directly to home projects. Taking time to maintain your kit means fewer mid-project surprises and consistent results across multiple jobs.
Conclusion
Concrete hand tools are straightforward, affordable, and built to last if you care for them. Start with a solid trowel, float, and finishing tools for your specific project, add safety gear without question, and you’re ready to tackle small slabs, repairs, and decorative work. The best investment isn’t fancy equipment, it’s understanding how each tool works and practicing on small jobs before tackling larger ones. Every concrete finisher started exactly where you are now.